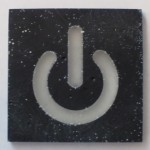
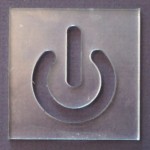
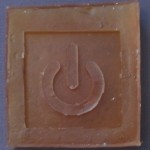
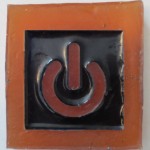
 One of the features I wanted with my capacitive switch was the ability to package the device in a non-traditional package. In contrast to a regular push button the capacitive switch geometry is very configurable just by sizing the electrodes. The capacitive switch I designed includes an RGB backlight so my package options need to have some level of transparency.
 As an initial test of the manufacturing process I decided to build a simple on/off switch. The photo shows the resulting two colour design which features transparent text floating in a blue background matrix. So how did I do it? First I sketched the “ON” icon in Inkscape so that I could print it on a laser cutter in acrylic. The design needs to be thought out so that all elements are supported by the background. For text this means you are limited in your font selection to a stencil style font. The reason this is important is because if you have a design element like an “O” character the center will fall out when its cut on a laser cutter. With a stencil font small supports are left in place to hold the center of the “O” from falling out. Of course this issue extends to all elements of your Inkscape design. In the case of my “ON” icon I wanted the symbol to be clear in the final design with a solid background fill.
 Once I have a laser cut model of the design I need to create a mould to cast the design. I mount the acrylic pattern inside a modelling clay frame and spray the whole thing with a parting agent. Once the parting agent has dried I poured urethane rubber over the mould and let it cure for 24 hours which creates a nice mould of the laser cut acrylic part. The urethane mould is a positive mould where all of the design features are raised while the background is in relief.
 To pour a cast of the part using the mould you need to spray the urethane mould with a parting agent. In retrospect I should have used a silicone mould which would have eliminated this step because the resin doesn’t stick to the silicone. I mix the two part Smooth On resin with a drop of blue dye and pour it into the mould. The trick here is that you need a very small quantity of resin (1/4oz) because you only want to fill the mould to the point where the background is covered with resin; the design elements need to protrude through the resin. I cut the acrylic model out of 1/4″ material so that the design elements protrude 1/4″. The resin needs to be poured to a depth of 1/16″ to 1/32″ but always less than 1/4″. The polyester resin hardens in about an hour so I can remove it from the mould yielding a blue coloured background with a hole where the text will be.
I now clean the cast model with soap and water to remove all traces of parting agent. If you omit this set your design will physically fall apart after the next casting step. The coloured background is set up in a modelling clay frame that butts up against the edge of the model. Without applying parting agent 1/4oz of resin is mixed and poured into the frame to fill in the text with clear plastic. An hour later your moulded part has cured and is ready. You now have a two coloured inlay design.
 I sand the front surface of the cast part with 120, 320,400 and 600 grit wet/dry sandpaper to give it a polished look. As you can see from the photos I have small bubbles (so I only sanded to 120 grit) in the surface of the cast which is a process problem that I need to resolve. There are several ways to remove bubbles from casting resin. Commercially the casts are held in a light vacuum that pulls the bubbles out of solution by reducing the vapour pressure. The home brew alternative is to pour the resin from a height of 3′ so that the resin is poured as a fine filament which effectively pops all of the bubbles entrapped when mixing the resin. The hard part is pouring 1/4 oz of resin from three feet onto a 1 1/4″ target. This picture shows the benefit of the high altitude pour, there are virtually no bubbles.