The goal of today’s lesson is to show you how to transfer an arbitrary design into Tinkercad so that it can be 3D printed. The first difficult you need to deal with is scaling your design so that it will be small enough to print quickly but big enough to provide some detail. Albrecht Durer 1471-1528 developed a technique for creating perspective paintings. In this technique a grid is overlaid on the image to transfer and each grid element is then copied to a new grid. Effectively we are dividing up the image complexity into blocks that are small enough that we can draw them easily in Tinkercad. The scaling of the image occurs because we use fixed 5mm cubes in Tinkercad to build up our image. While this example shows how the technique can be used to capture a Minecraft character; it works equally well with other complex images. So lets get started.
Instructions
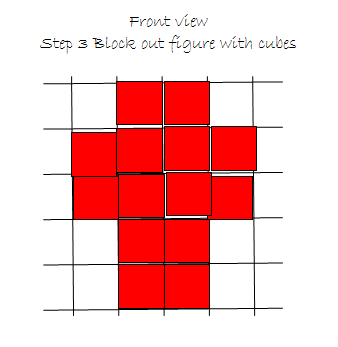
1. Draw a square grid approximately 4×5 over your figure.
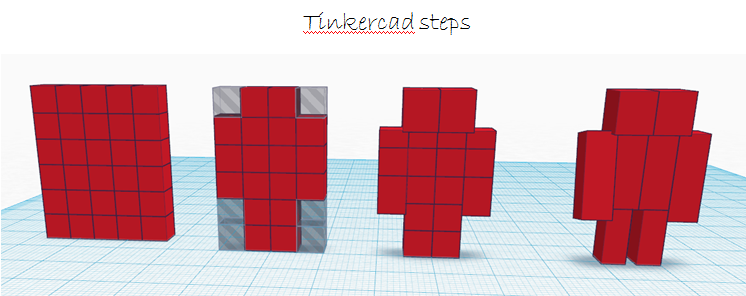
2. In Tinkercad draw a set of 5mm cubes that matches the number of grid spaces you created in step 1. ie) If your grid in step 1 is 4×5 then you need 20 blocks.
3. In Tinkercad block out the figure by turning unused blocks into holes. This leaves only the body elements.
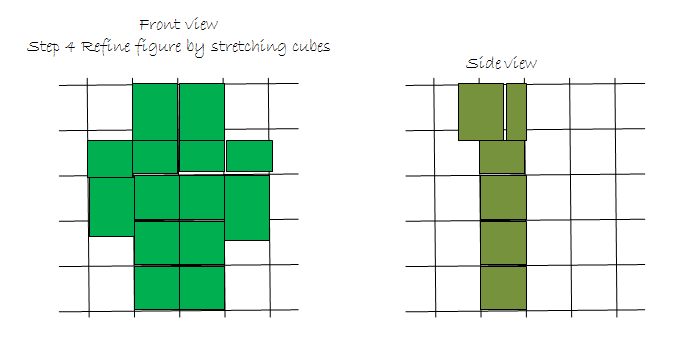
4. Refine the block sizes based on your picture. Estimate the percentage of each grid that is filled and try to replicate this in Tinkercad.
5. Refine it some more.